How To Add Mods To Lunar Client
In the constantly evolving world of games, Lunar Client has emerged as a top gaming platform that offers an unbeatable and improved gaming experience to players from all over the world. Although Lunar Client itself boasts a variety of options, its real excitement is in the realm of mods, which are third-party tweaks that allow you to take your gaming to new levels.

This complete guide will clarify the procedure of adding mods and modifications in your Lunar Client, giving you the ability to personalize the gaming experience you enjoy, include new features, and remain ahead of the gaming scene. If you’re an experienced gamer seeking to discover new levels or a Lunar Client fan who wants to improve your gaming experience, this step-by-step guide will guide you through the procedure in a clear and precise manner.
From understanding the basic concepts of Lunar Client and the significance of mods to the practicalities of installing, sourcing, and setting them up, this guide will cover all aspects. We’ll discuss potential issues and offer troubleshooting suggestions that will ensure a seamless and enjoyable modding experience.
Join us on this journey with us, and in no time, you’ll be navigating the gaming world by using a Lunar Client that is specifically tailored to your needs. Let’s explore the maximum capabilities that Lunar Client mods together.
Understanding Lunar Client

Lunar Client stands as a popular gaming client that has earned a lot of attention for its efficiency, improved performance, and extra features designed specifically for Minecraft gaming. With a simple interface and an emphasis on offering a better gameplay experience, Lunar Client has become an essential tool for Minecraft gamers.
Why Lunar Client? Lunar Client distinguishes itself by providing features such as improved FPS (frames per second), anti-cheat mechanisms, and a more fluid gameplay experience. Knowing the fundamental functions of Lunar Client sets the stage to integrate mods seamlessly.
1. The Significance of Mods
Mods, which are short for modifications, are essentially custom-made modifications to the game that modify or improve the game’s capabilities. Within the Lunar Client, mods play an essential function in personalizing the game experience. They can range from visual enhancements to performance adjustments that provide you with a custom-made gaming experience that is in line with your personal preferences.
2. Popular Types of Mods for Lunar Client
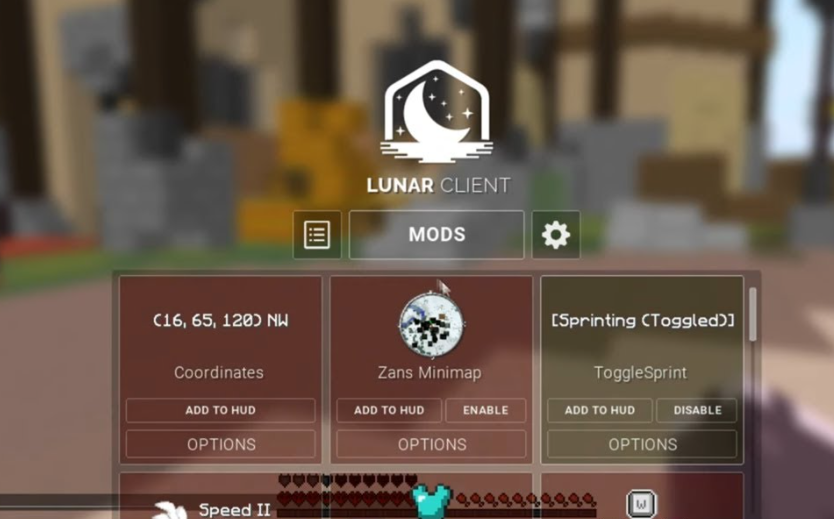
Explore mods that include texture enhancements, mini-maps, mini-maps, and HUD (heads-up display) modifications, as well as the ones that add brand-new elements to gameplay. Knowing the various mods that are available will allow you to select ones that align with your style of gaming.
How Do You Add Mods To Lunar Client
The addition of mods to Lunar Client can be a straightforward procedure that can be completed in a couple of steps.
Step 1: Download the mod
It is the first thing to do when downloading the mod you wish to include. Mods are available on numerous websites; however, the most well-known and trusted source is CurseForge. Once you’ve located the mod you’re looking for, then download it onto your computer.
Step 2: Open Lunar Client
After the mod has been downloaded, you can start Lunar Client. It is done by clicking the Lunar Client icon on your desktop or looking for it in the Start menu.
Step 3: Create a Mods folder
If you’ve not already done so, create a mods folder, do so now within the Lunar Client directories. You can locate your Lunar Client directory by right-clicking on the Lunar Client icon on your desktop and choosing “Open file location.” After you have access to your Lunar client directory, you can create an additional folder named “mods.”
Step 4: Transfer the mod to the mods folder
Once you’ve created your mods folder, copy the mod you downloaded into the folder.
Step 5: Launch Lunar Client
Once the mod is placed in the folder for mods, open Lunar Client; the mod should be loaded and ready for use.
Step 6: Enable the mod
To activate the mod, start your Lunar Client settings menu and select the “Mods” tab. Choose the mod you want to enable and then click the “Enable” button.
Step 7: Enjoy your mod
After the mod has been enabled, it should be able to apply it within your game.
Preparing Your Lunar Client
Before you begin exploring the world of mods, you need to make sure that the mods you’re planning to install are compatible with the specific version of Lunar Client. In the speed-of-change world of Minecraft updates, a variety of issues can occur, causing issues with compatibility.
1. Ensuring Compatibility
- Make sure you are using the latest Version of the Lunar Client and then compare it to the requirements for version set out by mod developers.
- Visit the forums, communities and online discussions to find details on compatibility of certain mods to Your Lunar Client version.
2. Backing Up Your Lunar Client
It is essential to prepare before venturing into the world of mods. Before you make any changes, making backups ensures that you are able to revert back to the previous condition in the event that something goes off the rails.
3. Creating a Backup
- Find this directory in your Lunar Client PC.
- Take the whole Lunar Client folder and copy it in a separate folder for backup.
- This preventive step will ensure that the primary Lunar Client setup is preserved and provides a security in the event of experimenting.
With backups and compatibility checks installed, you’re ready to begin the exciting process of upgrading your Lunar Client by adding mods. The next section will walk users through searching for how to install, configure, and install mods that will enhance the gaming experience. We’ll be able to do it with confidence!
Installing Mods On Lunar Client

Once the Lunar Client is set to allow customization, it’s the time to investigate the wide range of mods that are available. Trustworthy sources, like official mod websites as well as reputable forums, are your top places to download safe and secure files.
1. Step-by-Step Guide on Downloading Mods
- Access trusted mod repositories or forums.
- Find the mod you want and make sure it’s in sync with the Lunar Client version.
- Click the download link and download the modified file in the specified directory on your computer.
2. Avoiding Potential Issues
- Beware of non-official sources and only download modifications from trusted websites to reduce the chance of malware or corrupted files.
- Check that the updated version matches that of your Lunar Client version to ensure an easy integration.
3. Installing Mods
Mod files are safe on your PC. Installing them is the next important step. Lunar Client simplifies this process and makes it easy for gamers of all levels.
4. How to Install Mods on Lunar Client
- Start your Lunar Client launcher.
- Go to”Mods,” then click the “Mods” tab.
- Then drag and drop your mod file into the appropriate space or click on the “Add Mod” button and select the mod file.
- After the mod has been added Once the mod has been added, select “Done” to save the modifications.
5. Common Issues and Troubleshooting Tips
- If a modification fails to load, make sure it is compatible to your Lunar Client version.
- Certain mods could have dependencies. Make sure that you have all the mods or libraries installed.
After successfully adding mods in Your Lunar Client client, you’re in a position to customize your Minecraft experience. The next section will help you test setting up, configuring the mods, and keeping them up-to-date to ensure a smooth and enjoyable gaming experience. Let’s go on our journey!
Conclusion
In the world of Minecraft, Lunar Client stands as a beacon to enhance performance as well as a better gaming experience.
In this guide, we will conclude for adding mods for the Lunar Client client, it’s clear that you’ve gone on a path of personalization and customization. Through understanding the core capabilities, ensuring compatibility and knowing the art of installing mods unlocks the door to a realm of infinite possibilities. Mods can add the look of your landscapes, function for your HUD and provide new possibilities to your game.
While you explore this thrilling terrain, make sure you stay current, experiment with new modifications, and then be sure to share your findings with your gaming friends. Your Lunar Client isn’t only a game platform anymore; it’s an individual experience that reflects your individual style of gaming. Let your Minecraft world forever change and your gaming experience rise to new levels.


